Wednesday, February 23, 2011

Blood Orange Yogurt Cake

I've been doing a lot of baking lately, which means I've been going through a lot of butter, sugar and eggs. While it's been producing some really tasty results, it seemed about time to lighten things up.

Yogurt cake is a great way to have a rich dessert without too much fat or sugar. The version I made here was actually for a breakfast party in my health class. Recipes frequently call for a dollop of whipped cream on top, that seems to defeat the purpose of a healthy cake to me. I served mine with a quick fruit salsa so people could see what the blood oranges looked like.

I adapted this recipe for Orange Yogurt Cake to use blood oranges , but either works great. I've had trouble with whole wheat flour before, but I used it in this recipe and it worked great. (I recommend Bob's Red Mill Organic Whole Wheat Pastry Flour). Cutting the whole wheat flour with white flour helps keep the cake light, but I might try it next time with all whole wheat flour.

Pictures are once again by Mr. Dominic Luongo, well except for the last one which was taken while serving it in class. Unfortunately we'll be back to bad cellphone pictures after this.

Blood Orange Cake

1 cup whole wheat flour
1/2 cup all purpose flour
2 teaspoons of baking powder
1/2 teaspoon salt
1 cup plain nonfat yogurt
1/2 cup sugar
juice of one blood orange
zest of about 1 1/2 blood oranges
1/2 teaspoon vanilla extract
1/2 cup vegetable oil

Preheat oven to 350 degrees.
Line a 9 inch round pan with parchment and spray with nonstick spray (it would probably be fine to skip the parchment).

Zest the blood oranges.

Juice one blood orange.

Whisk together yogurt, sugar, eggs, zest, vanilla extract, and juice.

In another bowl, mix together both flours, baking powder, and salt in one bowl.

Slowly whisk the dry ingredients into the wet ingredients. Use a rubber spatula to incorporate the vegetable oil.

Pour the batter into the round pan.

Bake about 50 minutes, until a toothpick inserted into the center of the cake comes out clean.

Let cool and then serve slices with a dollop of whipped cream or fruit salsa (or both).

Fruit Salsa
the juice and zest of one lime
1-2 tablespoons honey
2 blood oranges, peeled and diced
1 can of pear in juice, drained and diced

Mix together zest, juice and honey in a bowl, add blood oranges and pears, toss to coat.

Thursday, February 17, 2011

Blood Orange Bars


As the temperature dipped into negative numbers recently, I really found myself craving citrus. This was amplified by the appearance of blood oranges at my local Wegmans (they're difficult to find even when they're in season). So of course I stocked up on blood oranges and immediately began making plans to do some baking with them.

I enlisted a friend (Mr. Dominic Luongo) to take pictures, so you wouldn't have to put up with any of my fuzzy rushed cellphone pictures.

First I attempted Blood Orange 'Lemon' Bars. They turned out great, not as pink as I'd have liked, but they were really delicious. The only problem I encountered was that I forgot to grease the baking pan. With some recipes you can get away with forgetting, but here it was absolutely crucial. The bars completely stuck to the pan. They still tasted good, but were a bit messy.

Another crucial step, zesting. I've recently begun a love affair with zesting citrus. For some reason I used to think it was gross, but it adds nice color and extra citrus flavor. (Also it makes your hands smell amazing). Just make sure to zest before juicing the citrus, it's much easier in that order.

If you aren't able to get a hold of blood oranges, I think any combination of citrus would work. Obviously the classic lemon, but orange/lime would be interesting, or maybe grapefruit. Use your favorite or whatever looks good at the grocery store.
Blood Orange 'Lemon' Bars

Crust
3/4 cups unsalted butter
1/3 cup sugar
1 1/2 cups flour
pinch of salt

Filling
1 1/2 cups sugar
3 eggs
2/3 cup juice, half blood orange and half lime
2 Tablespoons zest, half blood orange and half lime
2/3 cup flour

Preheat oven to 350.

Zest the limes and blood oranges. I used the small grate side of my box grater, but if you have a zester you can obviously use that.

Juice the limes and blood oranges. (Now your hands will smell amazing.) Set juice and zest aside.

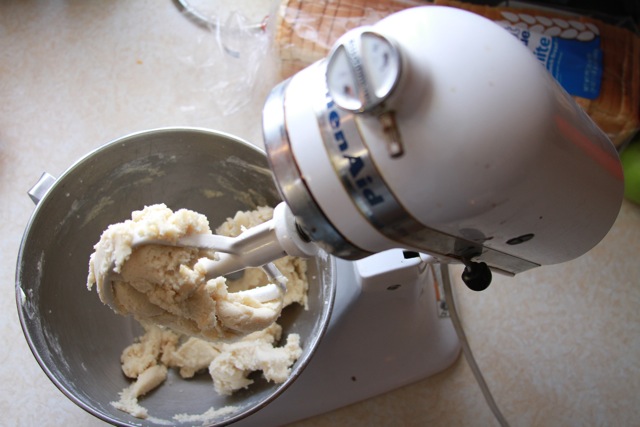
Cream together butter and sugar, then slowly add flour and salt.

Transfer to greased baking dish (I used my 13 by 9 baking dish, but I'd recommend something smaller.) Press the dough down evenly in the baking dish (using your hand is the easiest way to do it).

Bake for 20-25 minutes, until lightly golden, set aside to cool (in your fridge/freezer if you're impatient.)

In you mixer (or with a whisk) mix together the eggs and sugar.

Add the juice and zest, mix thoroughly.

Pour the filling over the cooled crust.

Bake for another 30-35 minutes, until the filling is set. (There was a big air bubble in mine when it finished baking, but it went down.)

Let cool.

Sprinkle with powdered sugar and garnish with slices of blood orange.

Thursday, February 10, 2011

Oreo Truffles

Originally I had planned elaborate treat baskets for all my friends for Valentine's Day, but I decided to make them into favor bags for Charlie's upcoming birthday party.

I've already made regular chocolate truffles for the favor bags, but I thought it would be nice to try out a new recipe too. Just about every food blog I read as made Oreo Truffles, and being so simple I just couldn't resist them. After having tried one I know I'll be making them again.

These Oreo Truffles are SO good. The centers are crunchy and creamy. They're so rich and decadent that I really only needed to eat one.

From what I've read you can use any kind of Oreos to make the truffles, so whatever flavor you feel like. I wouldn't recommend using Double Stuffed, people have said they fall apart and I think they would be too sweet. But feel free to experiment with golden, mint or chocolate filled Oreos. (I used generic Wegmans Sandwich Cookies and they worked perfectly.)

Use chocolate or white chocolate candy melts, it doesn't matter. I like the contrast between the centers and the white chocolate, but regular chocolate would be very delicious.

Oreo Truffles
(as seen on the internet everywhere)
1 package of Oreo chocolate sandwich cookies
8 oz cream cheese, softened
1 lb(ish) white chocolate candy melts

Crush the Oreos as fine as you can get them, either with a food processor or a large ziplock bag and a lot determination. (I smashed them in a ziplock bag and it worked out great.)

In a large bowl, mix the crushed cookies and cream cheese. You can use a spoon, but it's much easier to mix by hand.

Scoop and roll out small balls of the cookie mixture. You want to get about 35-40 truffles, so use a teaspoon as a scooper. They should be one bite.

Chill for about an hour in the fridge (or half an hour in the freezer if you're impatient).

Melt white chocolate wafers in a double boiler or in the microwave. It took about 2 minutes in the microwave. You don't want it too hot, so pull it out before it's completely melted and stir it the rest of the way.

Dip each truffle into the melted chocolate and drop onto a parchment paper/wax paper lined tray. Once you've dipped them all, use a fork to shake any remaining chocolate over the top of the truffles.

Refrigerate until set.

Lazy Valentines Day

At this point I'm sure it's pretty clear to everyone that I love to bake and cook from scratch. It would probably be no surprise that I don't care for the 'semi-homemade' way of doing things. Yesterday I sat a friend down and made them watch Semi-Homemade with Sandra Lee, to show them exactly what I didn't want for a mass media project I'm doing (and for a cooking video I'll be shooting soon).

So knowing all this, you'd probably think my semi-homemade Valentine's Day plans were a little strange. (I had Valentine's Day with my boyfriend last week because of scheduling conflicts.) Unfortunately I don't have any pictures for you, but I thought I'd just share my ideas.

I love baking A LOT, but sometimes it's nice to go out to a bakery (I recommend Sweet Tooth on Elmwood.) and pick out a couple little treats to share. For Valentine's Day we just picked up a couple cannolis, a slice of red velvet and a slice of cheesecake and shared the dessert feast. Of course, if you're going to have so much dessert, you can't have a very big dinner so I decided to finally break out my fondue pot.

I used the Pioneer Woman's cheese sauce from her "Welsh Rarebit" recipe and it was crazy delicious. For dipping I just toasted up some chunks of bread and chopped some raw broccoli. It took 10 minutes tops but having the fondue pot made it feel like a special occasion.

I'm sure I'll be repeating this formula since it worked so well and then I will take pictures. But for now I just wanted to remind you that you can have a nice easy Valentine's Day without going to an expensive restaurant.


(Note: If you don't have a fondue pot you can pick one up and all the fixings for fondue for considerably less than the cost of dinner at The Melting Pot.)

Sunday, February 6, 2011

Starbucks VIA Coffee Pudding (for two)

Starbucks VIA is delicious. I've pretty much stopped going to Starbucks during the week because of the 50 count box of Starbucks VIA at my house. (Unfortunately, no one is paying me to say this.)

So when I found this effortless Espresso Pudding recipe I thought it would be a fun way to incorporate my favorite instant coffee and of course it would save me a trip to the store since I had all the other ingredients.

The recipe yields just enough for two people, so it's perfect for date night. I poured it into martini glasses to chill. I added chocolate chips because my pudding was a little lumpy (I didn't pay enough attention to it, because I was also baking naan.) The end result was super delicious.

Starbucks VIA Coffee Pudding
¼ cup firmly packed brown sugar (I used light brown)
1 Tbs cornstarch
1 packet Starbucks VIA Instant Coffee
1 ¼ cups half-and-half, divided


In a saucepan mix the instant coffee, cornstarch and brown sugar (do not heat yet). Add 1/4 cup of the half-and-half
and whisk until the instant coffee is mostly dissolved. Add the rest of the half-and-half. Whisking frequently, bring to a boil over a medium heat and whisk constantly at a boil for a minute. Remove from heat and pour into cups, ramekins, or martini glasses. Chill for a few hours and enjoy.

Friday, January 28, 2011

Easiest Artisan Bread


If you're too lazy to make this No-Knead Crusty Artisan Bread, then you don't deserve fresh baked delicious bread.

I've made this a couple times, the recipe makes four loaves, sometimes I make them all at once or spread them out over a week. I'm making all four today for the party tomorrow, but usually I make them separately so I can constantly have fresh bread.

I look up other bread recipes but I always come back to this one, its the easiest and tastiest.
The outside is perfectly crusty and the center is nice and soft.

(Recipe as published on the King Arthur Flour website.)
No-Knead Artisan Bread
3 cups lukewarm water
6 1/2 to 7 1/2 cups all purpose flour
1 tablespoon salt
1 1/2 tablespoons instant yeast

*The flour/liquid ratio is important in this recipe. If you measure flour by sprinkling it into your measuring cup, then gently sweeping off the excess, use 7 1/2 cups. If you measure flour by dipping your cup into the canister, then sweeping off the excess, use 6 1/2 cups. Most accurate of all, and guaranteed to give you the best results, if you measure flour by weight, use 32 ounces.

1. Combine all of the ingredients in a large mixing bowl, or a large (6-quart), food-safe plastic bucket. For first-timers, “lukewarm” means about 105°F, but don’t stress over getting the temperatures exact here. Comfortably warm is fine; “OUCH, that’s hot!” is not. Yeast is a living thing; treat it nicely.

2. Mix and stir everything together to make a very sticky, rough dough. If you have a stand mixer, beat at medium speed with the beater blade for 30 to 60 seconds. If you don’t have a mixer, just stir-stir-stir with a big spoon or dough whisk till everything is combined.

3. Next, you’re going to let the dough rise. If you’ve made the dough in a plastic bucket, you’re all set — just let it stay there, covering the bucket with a lid or plastic wrap; a shower cap actually works well here. If you’ve made the dough in a bowl that’s not at least 6-quart capacity, transfer it to a large bowl; it’s going to rise a lot. There’s no need to grease the bowl, though you can if you like; it makes it a bit easier to get the dough out when it’s time to bake bread.

4. Cover the bowl or bucket, and let the dough rise at room temperature for 2 hours. Then refrigerate it for at least 2 hours, or for up to about 7 days. (If you’re pressed for time, skip the room-temperature rise, and stick it right into the fridge). The longer you keep it in the fridge, the tangier it’ll get; if you chill it for 7 days, it will taste like sourdough. Over the course of the first day or so, it’ll rise, then fall. That’s OK; that’s what it’s supposed to do.

5. When you’re ready to make bread, sprinkle the top of the dough with flour; this will make it easier to grab a hunk. Grease your hands, and pull off about 1/4 to 1/3 of the dough — a 14-ounce to 19-ounce piece, if you have a scale. It’ll be about the size of a softball, or a large grapefruit.

6. Plop the sticky dough onto a floured work surface, and round it into a ball, or a longer log. Don’t fuss around trying to make it perfect; just do the best you can.

7. Place the dough on a piece of parchment (if you’re going to use a baking stone); or onto a lightly greased or parchment-lined baking sheet. Sift a light coating of flour over the top; this will help keep the dough moist as it rests before baking.

8. Let the dough rise for about 45 to 60 minutes. It won’t appear to rise upwards that much; rather, it’ll seem to settle and expand. Preheat your oven (and baking stone, if you’re using one) to 450°F while the dough rests. Place a shallow pan on the lowest oven rack, and have 1 cup of hot water ready to go.

9. When you’re ready to bake, take a sharp knife and slash the bread 2 or 3 times, making a cut about 1/2″ deep. The bread may deflate a bit; that’s OK, it’ll pick right up in the hot oven.

10. Place the bread in the oven, and carefully pour the 1 cup hot water into the shallow pan on the rack beneath. It’ll bubble and steam; close the oven door quickly.

11.Bake the bread for 25 to 35 minutes, until it’s a deep, golden brown.

12.Remove the bread from the oven, and cool it on a rack. Store leftover bread in a plastic bag at room temperature.

Wednesday, January 12, 2011

Puff Pastry and Chocolate Croissants

All summer I thought about making puff pastry from scratch, but I didn't want to attempt it until the weather was cold. I think the wait paid off because the puff pastry was super simple and I didn't have a problem keeping it cold at all.

The most important tip to remember about puff pastry is that you can't let it get warm. If the butter gets warm and soft you won't have a flaky layered end product.

I'm including the steps to make chocolate croissants, but the uses for puff pastry are endless. It makes great appetizers (sundried tomato pinwheels), main courses (beef wellington), and desserts of course (apple turnovers).

The process may sound complicated, but if you go through it step by step it's very simple and just requires a little upper body strength and a cold fridge.

Puff Pastry

1 lb cold unsalted butter (4 sticks)
3 3/4 cups flour
1/2-1 tbsp salt (use less if for sweet preparations, more for savory)
1 1/4 cups ice water
extra flour for rolling dough out

In a food processor or stand mixer (I used the latter) mix together the flour and salt.
Add all of the water at once and mix until the dough forms a ball on the blade/paddle.
The dough will be soft and wet, it should be squeezable and pliable.
Roll the dough into a ball and slash the top into a tic tac toe pattern with a sharp knife.
Wrap the dough in a damp paper towel and let it rest in the fridge while you start the butter.

To make it easier to roll the butter out to an inch thick, slice each stick of butter in half, arrange the pieces in between 2 sheets of plastic wrap in a rectangle. Roll it until the pieces of butter are fused together and it is about an inch thick.

**Very Important: If at this point your butter is soft and oily, chill it in the fridge/freezer until firm again. Chill the butter while you roll out the dough.

Dust your workplace with flour (I used the counter next to a window that could be opened to further cool my kitchen) and unwrap the dough.
Roll the dough out into a 10 inch square. (Doesn't have to be perfect.)
Keep the dough well floured and turn it frequently to avoid the dough sticking.

Place the chilled butter in the center and fold the edges or 'ears' over to completely encase the butter. If you need to stretch the dough to cover the butter, stretch all the dough, not just the edges.

**Crazy Important: If the butter starts to ooze out or it seems too warm, play it safe and chill the dough for awhile. I keep my window blasting me with cold air while I rolled the dough out, just to be safe.

Now it's time to start rolling. You want to do six total 'turns of the dough', with at least 30 minutes chilling time between each set of 2 turns.

The first turn: 'gently but firmly' press down on each corner with your rolling pin to help keep the dough a square.
Roll the dough out into a rectangle that is about 24 inches in height. Make sure to roll from the center to ensure that the butter moves with the dough it is encased it. You may need to roll pretty hard to achieve this.

Once the dough is 24'' fold the dough into thirds like a business letter and brush off the excess flour with a pastry brush.

The second turn:
Turn the dough so that the closed fold is to your left, like the spine of a book. Roll the dough to 24'' and fold into thirds again.

At this point if the dough is still cold you could do the next two turns, but I preferred to take a break (my arms were tired). So the dough went into the fridge for 30 minutes.

The third, fourth, fifth, and sixth turn:
Exactly the same as the second, with chilling breaks whenever you need them.
Once you have finished rolling the dough you should chill it for at least an hour before you use it.

Chocolate croissants are effortless and tasty after all that rolling. Perfect for breakfast or dessert (or both).

Pain au Chocolate aka Chocolate Croissants
1/2 the puff pastry recipe
6 oz quality chocolate (chocolate chips work fine)
1 egg

Preheat oven to 375 degrees.
Roll out the puff pastry to about half it's thickness (you'll probably need a little flour). Cut into 6 even sized rectangles.
Arrange 1 oz of the chocolate at one end of each rectangle. Roll each rectangle up.

Place each croissant diagonally on a baking sheet and brush with egg wash (1 egg mixed up with a little water).

Bake 10-15 minutes until golden and flaky.

Drizzle with extra chocolate and serve or devour immediately.